Swordsman
KR S2 full package (S1 baseline + S2 deep-dive addenda).
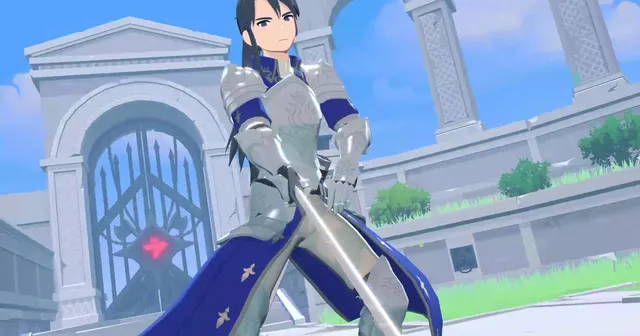
Start here
- Role
- DPS
- Line
- Sword
- Build cost
- 3 / 5
Evergreen S-tier melee; push your 3 core skills to +2 via gear rerolls first.
Tier by content Daily / Farming BRaid S Full tier list →
Core runes Thousand SwordsMana TorrentRock GiantBrand of Ruin
KR S2 data. TW has no 10★ runes or mado resistance yet, so treat this as what is coming, not as build advice.
Full Loadout (copy it as-is)
Every slot, every rune, every gem, spelled out. Pick your spend level and copy.
Cost-no-object endgame, including cash-only gems and pity legendary runes.
Swordmaster is on Thousand Swords' list of eligible classes. The cash-shop Heliodor is the only effect that multiplies rather than adds.
The 5 types of armor runes are fully compatible between parts — no matter the order.
+20% attack power when a Smash lands — fits the swordmaster habit of pouring everything into Smash
Be sure to set it with a resonating crystal
Adds +0.6% damage to enemies when holding the Brand of Destruction
Burn pet required. Best suited for flashy emblems. Stable without a pet+
When used, area damage also applies to Quegeum and Bigeom.
Increases skill use speed depending on concentration status (applies secret sword)
namu's core setup: Penetration / Falling Blossoms / Dancer. Bahamut 1520 calls Falling Blossoms core; Bahamut 2966 auto test on hard small Glas: about 5:30 with Falling Blossoms vs 6:15 with Fierceness. Fierceness+ (modifies skill 5) is the no-Blossoms alternative
Critical rate +10%, critical damage +30%. Guaranteed legendary runes are here
Gem tags: what one line is actually worth
A tag is a skill category. Each tag line on a Star Prism or Triple Quartz is either a damage line or a cooldown line, and it pays out only on skills carrying that tag — so check which tags your own skills have before deciding which lines to chase.
The eight tags
Per line, by gem stage
| Gem stage | Tag lines | If damage (each) | If cooldown (each) |
|---|---|---|---|
| Crude Star Prism | 1 | not published | not published |
| Crude Star Prism S | 2 | +1.7% | −0.55% |
| Star Prism (Elite) | 3 | +2.0% | −0.65% |
| Star Prism S | 3 | +2.1% | −0.70% |
| Whole Star Prism | 3 | +2.2% | −0.75% |
| Triple Quartz (Elite) | 2 | +2.1% | −0.70% |
Take damage in almost every case. The theoretical cooldown ceiling does not turn into more casts — this game's pre- and post-cast delays and the boss's own rhythm eat it. Cooldown lines are worth it only to tighten a supporter's buff cycle, or to stand in for a cooldown rune.
Swordmaster gem tags: Smash 93%, and line two moved
The numbers come from what the Korean community has documented over the past year — namu wiki's item entry, the Inven gem-tag guide, and a KR player-built gem simulator. Nexon publishes the rules but not the figures, so these are the values the Korean sources have agreed on for long enough to rely on.
There used to be two figures for the weapon Heliodor's damage bonus (namu +5%, a community simulator +3%). Nexon Taiwan's own package notice (3504945) prints “damage +5%”, matching namu, so it is settled. The green Heliodor's “1.5% damage to all skill tags” is likewise official text (3541044).
The English gem and tag names here are ours, rendered from the Korean. There is no English release of this game, so no official English names exist.
Guides for this class
The data is above; these are the long reads that turn it into a plan.
- Swordmaster gem tags: Smash 93%, and line two moved A class mechanic staples Smash onto nearly everything. Line two switched from Combo to Support when the meta build moved, and Survival is the costly trap.
Skill mods
Sheet default. Modifications 3, 4, and 5
Ultimate damage-oriented variant
- · 345 even by community standard immediately after release
inven204
Penetration, composure, and one stroke axis · Move from KR S2 — TW N/A
Skill-enhancement order (what to take to 30 first)
Round 30 · “It is essential because all 4 skills used with the secret sword will be strengthened when strengthened.” · S0S1 · dc636904 2025-04-30
Round 30 · “This is also essential to extract crazy damage.” · S0S1 · dc636904
Round 30 · 3rd place. Numbers 2 and 3 are not subject to reinforcement. · S0S1 · dc636904
Star seal order
+Attack power 10% · Percentage increase to maximum single slot value
+Attack power 300 · -
+Attack power 150 · -
Each +Defense 100 · Hat, top, bottoms, gloves, shoes. Use it immediately on any area as soon as you get it.
Each +Defense 50 · lowest value
Use the random seal as soon as it appears, and open the armor selection box at the end after 4 out of 5 parts are filled. · If you open it when there are 0, the duplicate probability is 80%, when there are 3, it is 50%, and when there are 4, there is a 0% chance. The value of the selection boxes at 4 viewpoints is equivalent to 5 to 10 random boxes. · S0 · dc415710
Level-up bonus cards
#1 in all situations. The dealer order is attack > finesse > speed > stamina = defense.
inven350 + dc1880651
Swordsmen have unique corrections (Critical Chance +40% / Critical Damage +85%), so their critical card efficiency is ~1.41 times that of other occupations. There is a simulation that shows that luck growth (+30) slightly surpasses strength growth (+20). · S1 · dc1880651 + mabinogimobile#1342513 2025-06-18
15 Critical Attack · 25 Strong Cheer · 35 Adrenaline · 65 Chain Striker (Confirmed) · S0S1 · dc636904
5 Versatility · 10 Gourmet · 30 Sprint · 60 Fortitude
inven350
Reforge / stat priority
Smash (damage) ≥ Combo (damage) >>> Movement (damage). Tags available to this class: Smash, Combo, Support, Movement, Survival · The damage increase line always takes precedence over the cooldown decrease line.
Critical hit > Strong blow strengthening > Repeated hitting strengthening, skill power · Critical hit cut is 9,000~10,000 (criticality is higher than other jobs due to unique correction) · S0S1 · +
Smash, Combo, Movement across three lines; Smash/Combo/Support and Smash/Movement/Support are also played. At 2.5 lines it becomes Smash and Combo damage plus a Smash cooldown line · The data is from late S1, but the tag system has been the same since S0 · S1 · dc772117
Engraving (Runes)
No. 1 steel wedge · 1 · Required axis for S2, adoption rate 40%+
mabilife 07-14, erinn
No. 4 Big Sword Linkage · 2 · When using a big sword, concentrated consumption → Damage amplification, 480% based on 10 stacks
erinn, vortex 1189779, arca(via-search)
5 times seen through · 3 · Converts the insight into an instant attack, resets cooldown when entering concentration — passive parry → active attack
erinn, arca(via-search)
No. 4/No. 3 · alt · For setting old ‘Gwanakmu’ continuous deal (S1 mainstream)
vortex 1189779, S1 CSV
Skill Enhancement Priority
+ · Due to swordsman's unique correction (Critical Chance +40%/Critical Damage +85%), critical card efficiency is ~1.41 times that of other occupations. · dc 1880651
Skill Mods
Aligned with the axis of composure and one-pointedness. Move from S1 standard 345 (456 ultimate)
erinn
Gwanakmu continuous deal type residual setting
S1 CSV, vortex
Playstyles
Burst/Emerging Mainstream · The one-shot stabilization stack is strong. DPS valley if you fail to maintain focus. The cycle tempo is completely different from the S1, so I like it and dislike it.
vortex 1189779, arca(via-search)
Continuous Deal/Tradition · Some argue that stable DPS and total damage are comparable to or superior to those of Gwanpyeongil due to constant focus. Give up one ultimate shot
vortex 1189779
- · Abyss Hell, etc. Long-term match = audience failure (continuous), short-term match = audience hit (burst)
vortex 1189779
Rotation
1344 1434 → 1434 134 (repeat), 2=break, 5=see through (in boss charging pattern) · Old generation standards for gwanakmu
Focus on gauge management — Consume and amplify the composure stack with Bigeom (4), and immediately insert Ilsum (5). Exact number sequence not secured (GAP)
vortex/arca(via-search)
BiS / Stats
Rock Blade · Dazzling Afterimage · S2 Physics Common 1st Pick
erinn, mabilife
Crossing Chains/First Vow + Starflower/Never-Sleeping Fire · Broken border, gray curtain, cracked seal, blurry shape (erosion system) · Combination of Awakening + Dragon Gate + Erosion System
erinn
Liberation · Eternal Night · erinn; Youngbam = General purpose SSS (always 34-35%)
erinn, mabilife 엠블럼
Crit 9,000-10,000 (this class has its own correction, so the threshold sits higher), all-in on Smash; for the tag lines take Smash over Combo, Movement and Support
mabilife 스탯, erinn
Progression
erinn, mabilife